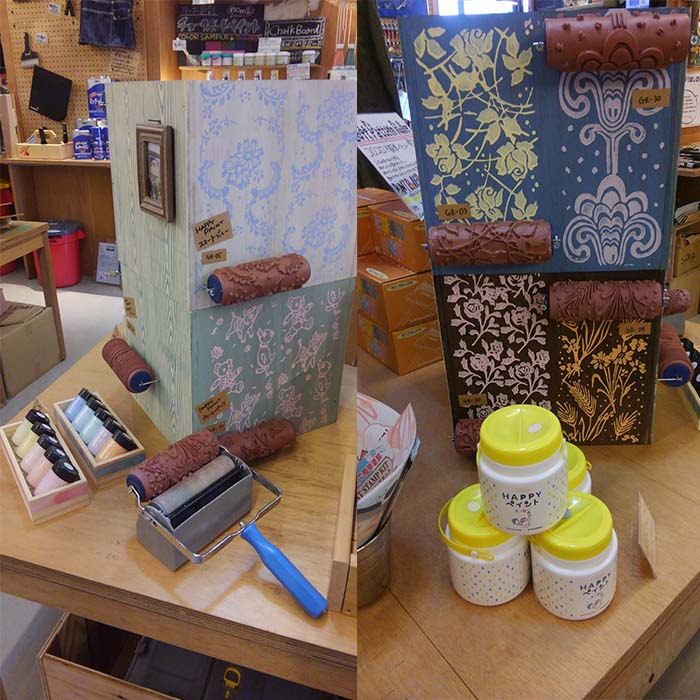
A Step-by-Step Guide to Using a Patterned Paint Roller
Patterned paint rollers offer an exciting way to elevate your interior decor by adding intricate designs to walls, furniture, and more. While they might seem a bit different from traditional paint rollers, using them is relatively straightforward. Here's a step-by-step guide to help you master the art of using a patterned paint roller effectively:
Materials You'll Need:
patterned paint roller: Choose a patterned roller that matches your desired design. There are various patterns available, from florals to geometrics.
Paint Tray: A regular paint tray will be used to load the roller with paint.
Paint: Select your desired paint color and type. Acrylic paint is commonly used for patterned rollers.
Painter's Tape: Use painter's tape to mask off areas you don't want to paint, such as trim or adjacent walls.
Drop Cloth or Plastic Sheets: These will protect your floors and furniture from paint splatters.
Step 1: Prepare the Surface:
Ensure the surface you're painting is clean, dry, and properly prepared. Repair any cracks, holes, or imperfections, and sand the surface if necessary. Cover nearby furniture and floors with drop cloths or plastic sheets to prevent paint splatters.
Step 2: Load the Roller:
Pour your chosen paint into a paint tray. Dip the Patterned rollers into the paint, making sure to evenly coat the patterned surface. Roll the roller back and forth on the tray's ridged section to distribute the paint evenly across the roller.

Step 3: Test on Scrap Material:
Additional resources:Corded & Cordless Drills Buying Guide
Choose the Best Planer for Woodworking
How to Choose the Right Hammer Drill for your ...
Before applying the paint to your wall or surface, do a test run on a piece of scrap material or cardboard. This allows you to see how the pattern transfers and get a feel for the pressure needed to achieve your desired results.
Step 4: Begin Painting:
Start at one corner of the wall or surface you're painting. Place the roller on the surface, applying light pressure. Roll the patterned roller smoothly and evenly along the surface in one direction. Try to maintain a consistent pressure to ensure an even pattern.
Step 5: Pattern Alignment:
When moving the roller to the next section, align the pattern with the previously painted section. This helps create a seamless and continuous design. If your Soft patterned paint rollers has a handle, you can use it as a guide to ensure proper alignment.
Step 6: Overlapping and Finishing:
As you roll the patterned roller, slightly overlap each pass to prevent gaps in the design. Continue this process, reloading the roller with paint as needed, until the entire area is covered. Allow the paint to dry according to the manufacturer's recommendations before removing any painter's tape.
Step 7: Clean the Roller:
After you've finished painting, clean the patterned roller thoroughly using water if you used acrylic paint. If you used oil-based paint, clean the roller with the appropriate solvent. Make sure to remove all paint residue from the patterned surface to keep it in good condition for future use.
Step 8: Admire Your Work:
Once the paint is dry and you've cleaned up, step back and admire your newly patterned surface! Patterned paint rollers can add a unique and artistic touch to your space, giving it a fresh and personalized look.
In conclusion, using a patterned paint roller involves preparing the surface, loading the roller with paint, testing the pattern, applying paint with even pressure, aligning patterns, and allowing the paint to dry. With practice and attention to detail, you can create stunning and eye-catching designs that enhance your interior decor.

Comments